Category: Arkade

  • Game Art

    I was a kid in the 80s and I’ve got a real soft spot for physical video games in cabinets. Aside from the game, there’s big chonky buttons, and glowing marquee art. 10 year old me was already very well acquainted with the concept of “coin return slots”. Finding a quarter in a coin return could make your whole week in 1980. The first game I ever came across was probably a PacMan in the Quinte Mall (probably pretty close to the Sneaky Pete’s)1.

    MAME Bezel Art

    I didn’t have retropie running very long before I found the bezel pack. Retro video games were displayed on 4:3 aspect ratio CRT monitors (picture Defender, or Joust). Some games turned the monitor sideways so basically 3:4 (think Centiped or PacMan). Other games (like the Donkey Kong Jr cocktail game) would flip the screen so that two players could sit on either side of the game.

    CRT monitors also had a prominent curved front so no matter how tight you fit the monitor in the cabinet there was going to be a gap. That’s where the bezel comes in to cover the gap and make the CRT look flatter. Nothing on the front of a video game goes undecorated so there was usually some bezel art (often with instructions and pricing). Then a flat piece of glass on top.

    Modern displays are wider aspect than CRTs (usually 16:9 or 16:10) so there’s some screen real estate on edges of the display for some artwork. Bezel art is a 16:9 aspect ratio (the ones I use are 1920×1080) image (png) with a transparent hole in the middle. The hole, centered in the screen is either 810×1080 or 1440×1080 depending on the expected orientation of the game. So there’s 555px or 240px on either side of the game for artwork.

    Marquee Art

    Most games also had a marquee. A translucent piece of backlit plexiglass on the top of the machine. The dimensions of the marquee art are less critical. I usually expect an aspect ratio of 32:9. On my retropie setup I display the marquee on the bottom half of a second monitor mounted above the main game monitor.

    Arkade Layout

    The Emulator object is passed a canvas reference where the game is drawn. When I first created index.html pages for the games, I just used the example code so they look pretty plain. I’d like to add the marquee and bezel art around the MAME canvas sort of like this:

    A big goal for this change was to come up with a way to do the layout without touching the loader.js code – ultimately that decision probably made my job easier. I had to learn some style sheet tricks, but didn’t have to get into someone’s javascript code and figure out how to paint on canvases.

    HTML For The Layout

    This is the HTML to represent the layout:

        <div id="wrapper">
    <img id="marquee" src="marquee.png" alt="Marquee">
    <img id="bezel" src="bezel.png" alt="Bezel">
    <div id="emularity">
    <canvas id="canvas" style="margin: 0; padding: 0"></canvas>
    </div>
    </div>

    CSS Tricks

    The normal layout for those entities would have the game canvas below the bezel, when they really need to overlap. I did that with CSS:

        <style>
    html, body {
    padding: 0; margin: 0;
    width: 100vw; height: 100vh;
    }
    #wrapper {
    position: absolute;
    width: fit-content;
    background-color: black;
    padding: 0; margin: 0;
    width: 100vw; height: 100vh;
    }
    #marquee {
    width: 100%;
    aspect-ratio: 32 / 9;
    opacity: 0.8;
    padding: 0; margin: 0;
    }
    #bezel {
    position: relative;
    pointer-events: none;
    z-index: 2;
    width: 100%;
    aspect-ratio: 16 / 9;
    opacity: 0.8;
    padding: 0; margin: 0;
    }
    #emularity {
    position: relative;
    z-index: 1;
    padding: 0; margin: 0;
    }
    </style>

    There’s quite a lot going on there. The bezel art and emularity div are relative position. That lets me position them dynamically (see below) but also gives me a z-index (bezel on top with canvas below). The user input needs to pass through the bezel and get to the canvas (so pointer-events: none). In all this, I’m trying to maximize the display so I zero all the padding and margins. The wrapper paints the background black and I set a little opacity on the images – which helped me troubleshoot the overlap – but now I just like the way it looks.

    Game Scale JS

    Then there’s a big update to the example script section to scale everything as the emulator is starting up:

        <script type="text/javascript">
    function game_scale(loader, canvas) {
    var wrapper = document.querySelector("#wrapper");
    var marquee = document.querySelector("#marquee");
    var bezel = document.querySelector("#bezel");
    var emularity = document.querySelector("#emularity");
    var rotation = 0;
    var rotated = ( rotation == 90 || rotation == 270 );

    // The Bezel art is 16:9 aspect-ration and has either a 4:3 (horizontal game) or 3:4 (vertical game)
    // transparent hole in the middle. The height of the game should be the same as the height of the hole
    // (which is just the height of the art).
    // The width of the hole depends on the aspect-ratio
    // - for e.g. centiped in a 1920x1080 bezel art the height is just 1080 and the width is 3/4*1080
    // The actual resolution for centiped doesn't match the aspect-ratio of the gap so the game will be a
    // little bit streched to fit the hole...
    var game_height = bezel.height;
    var game_width = Math.trunc(4.0/3.0 * game_height);
    if ( rotated ) {
    game_height = bezel.height;
    game_width = Math.trunc(3.0/4.0 * game_height);
    }

    // Tell the loader to draw the game in a canvas that is the computed width x height
    // and disable any scaling since those width x height values are computed to fit
    // perfectly.
    loader.nativeResolution.width = game_width;
    loader.nativeResolution.height = game_height;
    loader.scale = 1.0;

    // The game canvas is inside a div called "emularity".
    // Position the div so that it appears in the hole in the bezel art.
    // The bezel and emularity are 'position: relative' so that they can overlap *and*
    // the emularity div is declared second.
    // Set the emularity top value "-bezel.height" so that it moves from below the bezel
    // to overlapping.
    // The left edge the emularity div is the middle of the bezel minus half the game_width
    //
    // The wrapper div provides the black background stretch that out to fit the marquee and bezel
    emularity.style.height = game_height;
    emularity.style.width = game_width;
    emularity.style.top = -bezel.height;
    emularity.style.left = Math.trunc((bezel.width - game_width)/2.0);
    wrapper.style.height = marquee.height + bezel.height;
    wrapper.style.width = marquee.width;

    emulator.start({ waitAfterDownloading: false });
    }
    var nr = {width: 352, height: 240 };
    var canvas = document.querySelector("#canvas");
    var loader = new MAMELoader(MAMELoader.driver("robby"),
    MAMELoader.nativeResolution(nr.width, nr.height),
    MAMELoader.scale(1.0),
    MAMELoader.emulatorWASM("mameastrocde.wasm"),
    MAMELoader.emulatorJS("mameastrocde.js"),
    MAMELoader.extraArgs(['-verbose']),
    MAMELoader.mountFile("robby.zip",
    MAMELoader.fetchFile("Game File",
    "/roms/robby.zip")));

    var emulator = new Emulator(canvas, null, loader);
    window.addEventListener('onload', game_scale(loader, canvas));
    window.addEventListener('resize', function() { location.reload(true); });

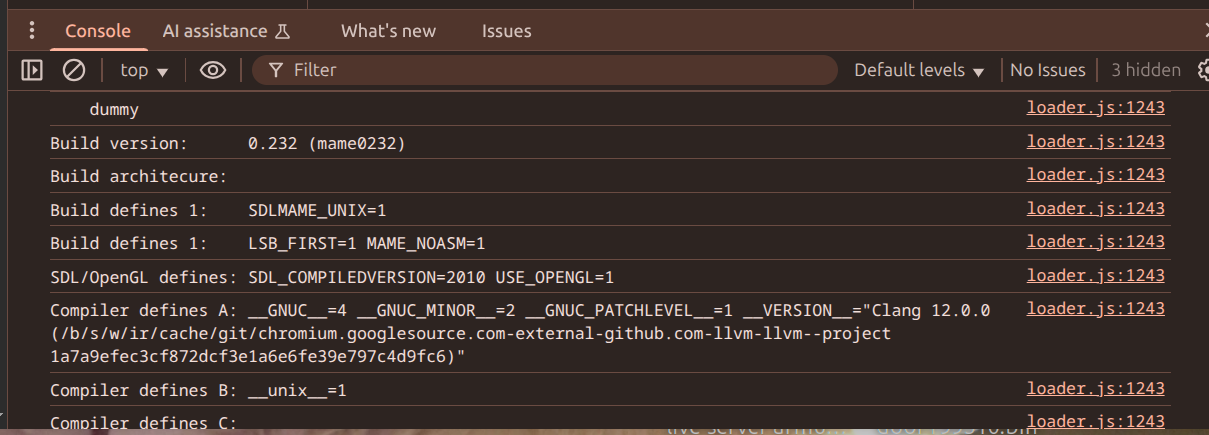
    There’s a bunch of “magic” hard-codes in the script above that are actually provided by the MAME meta database. During the build each game has a json summary of it’s meta data the one for robby looks like this:

    sandy@www:~/arkade$ more build/robby/robby.json 
    {
    "name": "robby",
    "description": "The Adventures of Robby Roto!",
    "sourcefile": "midway/astrocde.cpp",
    "sourcestub": "astrocde",
    "year": "1981",
    "manufacturer": "Dave Nutting Associates / Bally Midway",
    "players": "2",
    "type": "joy",
    "buttons": "1",
    "ways": "4",
    "coins": "3",
    "channels": "1",
    "rotate": "0",
    "height": "240",
    "width": "352"
    }

    MAME can tell you things like the rotation angle of the game, it’s native resolution (which I basically throw-out above). Ultimately the best way to code this up was to decide if the game is 4:3 or 3:4, figure out what the bezel art has been scaled to and then make the canvas the size of the hole in the bezel (and jam the scale to 1). The resize listener was a compromise, because I stayed out of the loader code, I can’t really resize the canvas on the fly – the emulator really needs to be restarted to get a new size. I force a reload on resize to recalculate the new canvas size(this restarts the emulator – but who’s really resizing the window mid game).

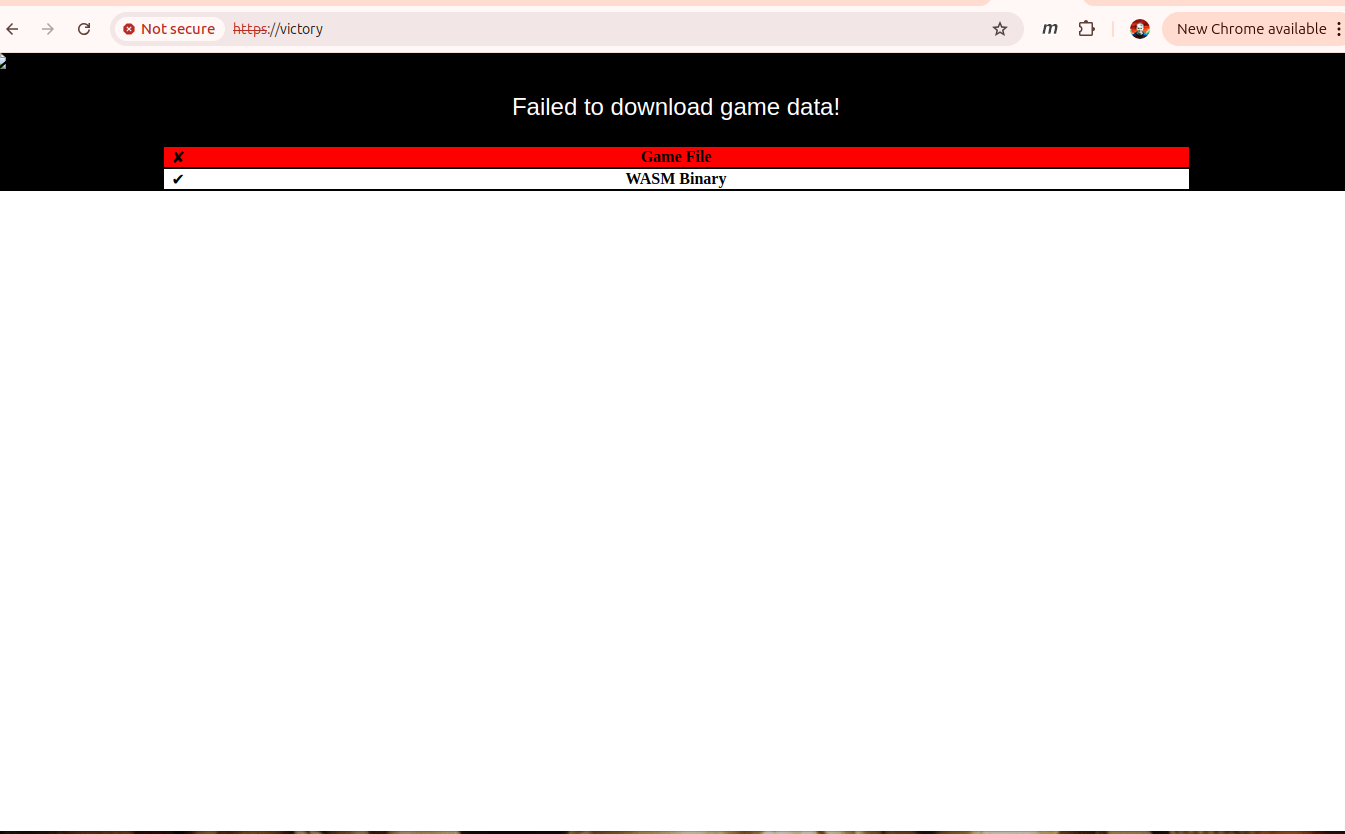
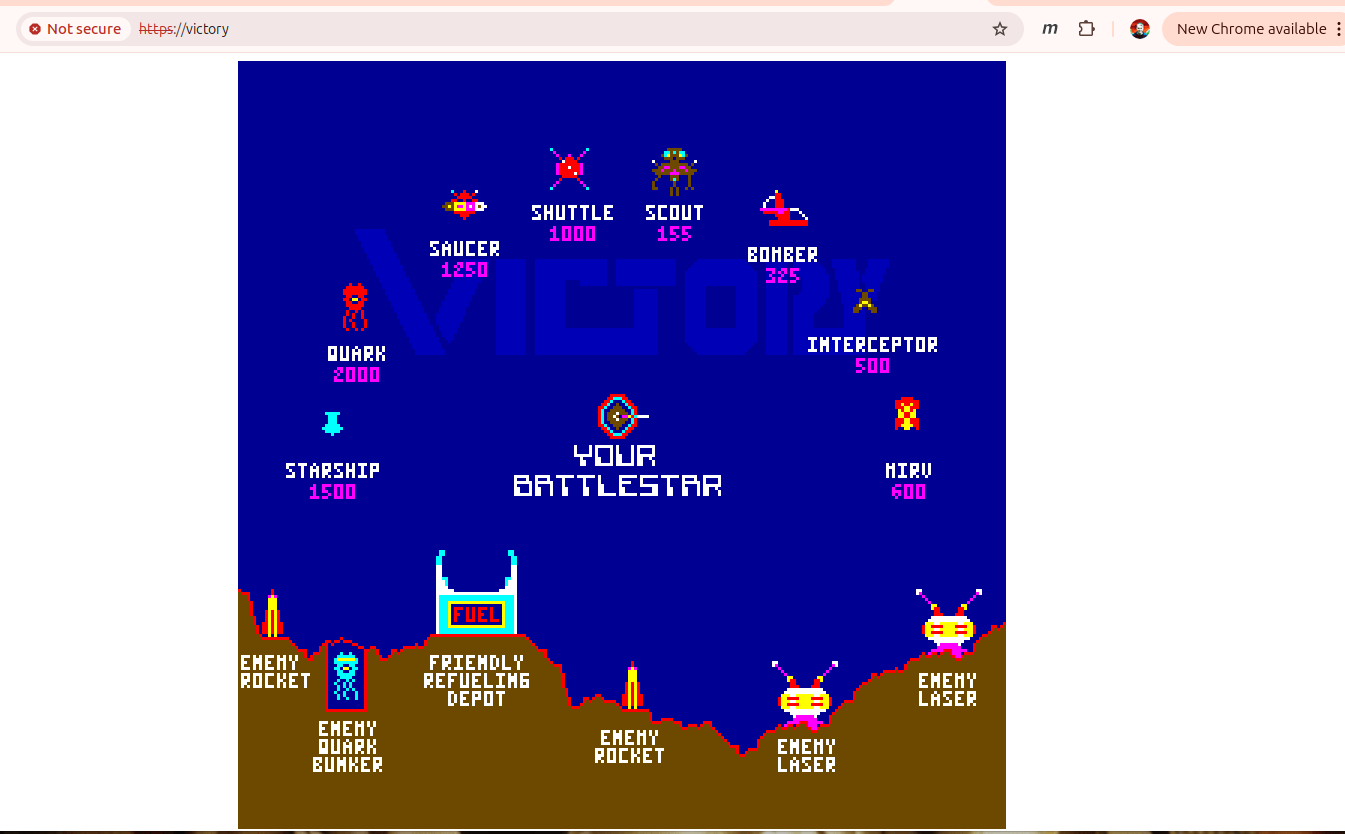
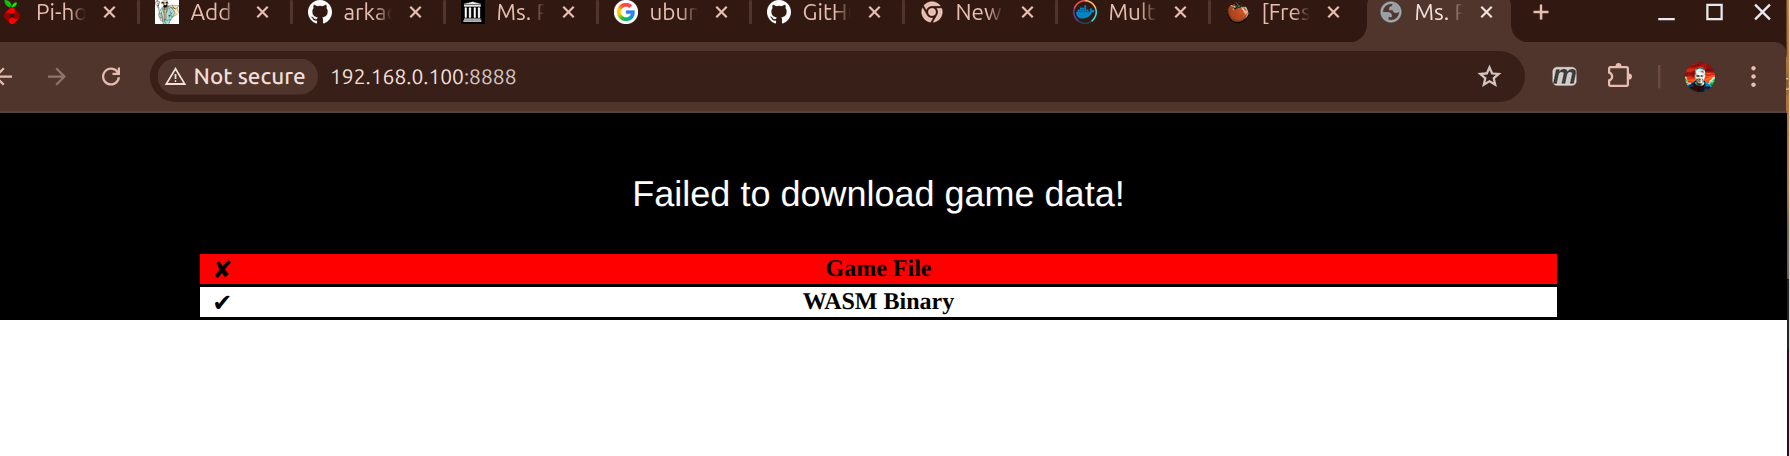
    The end result looks like these:
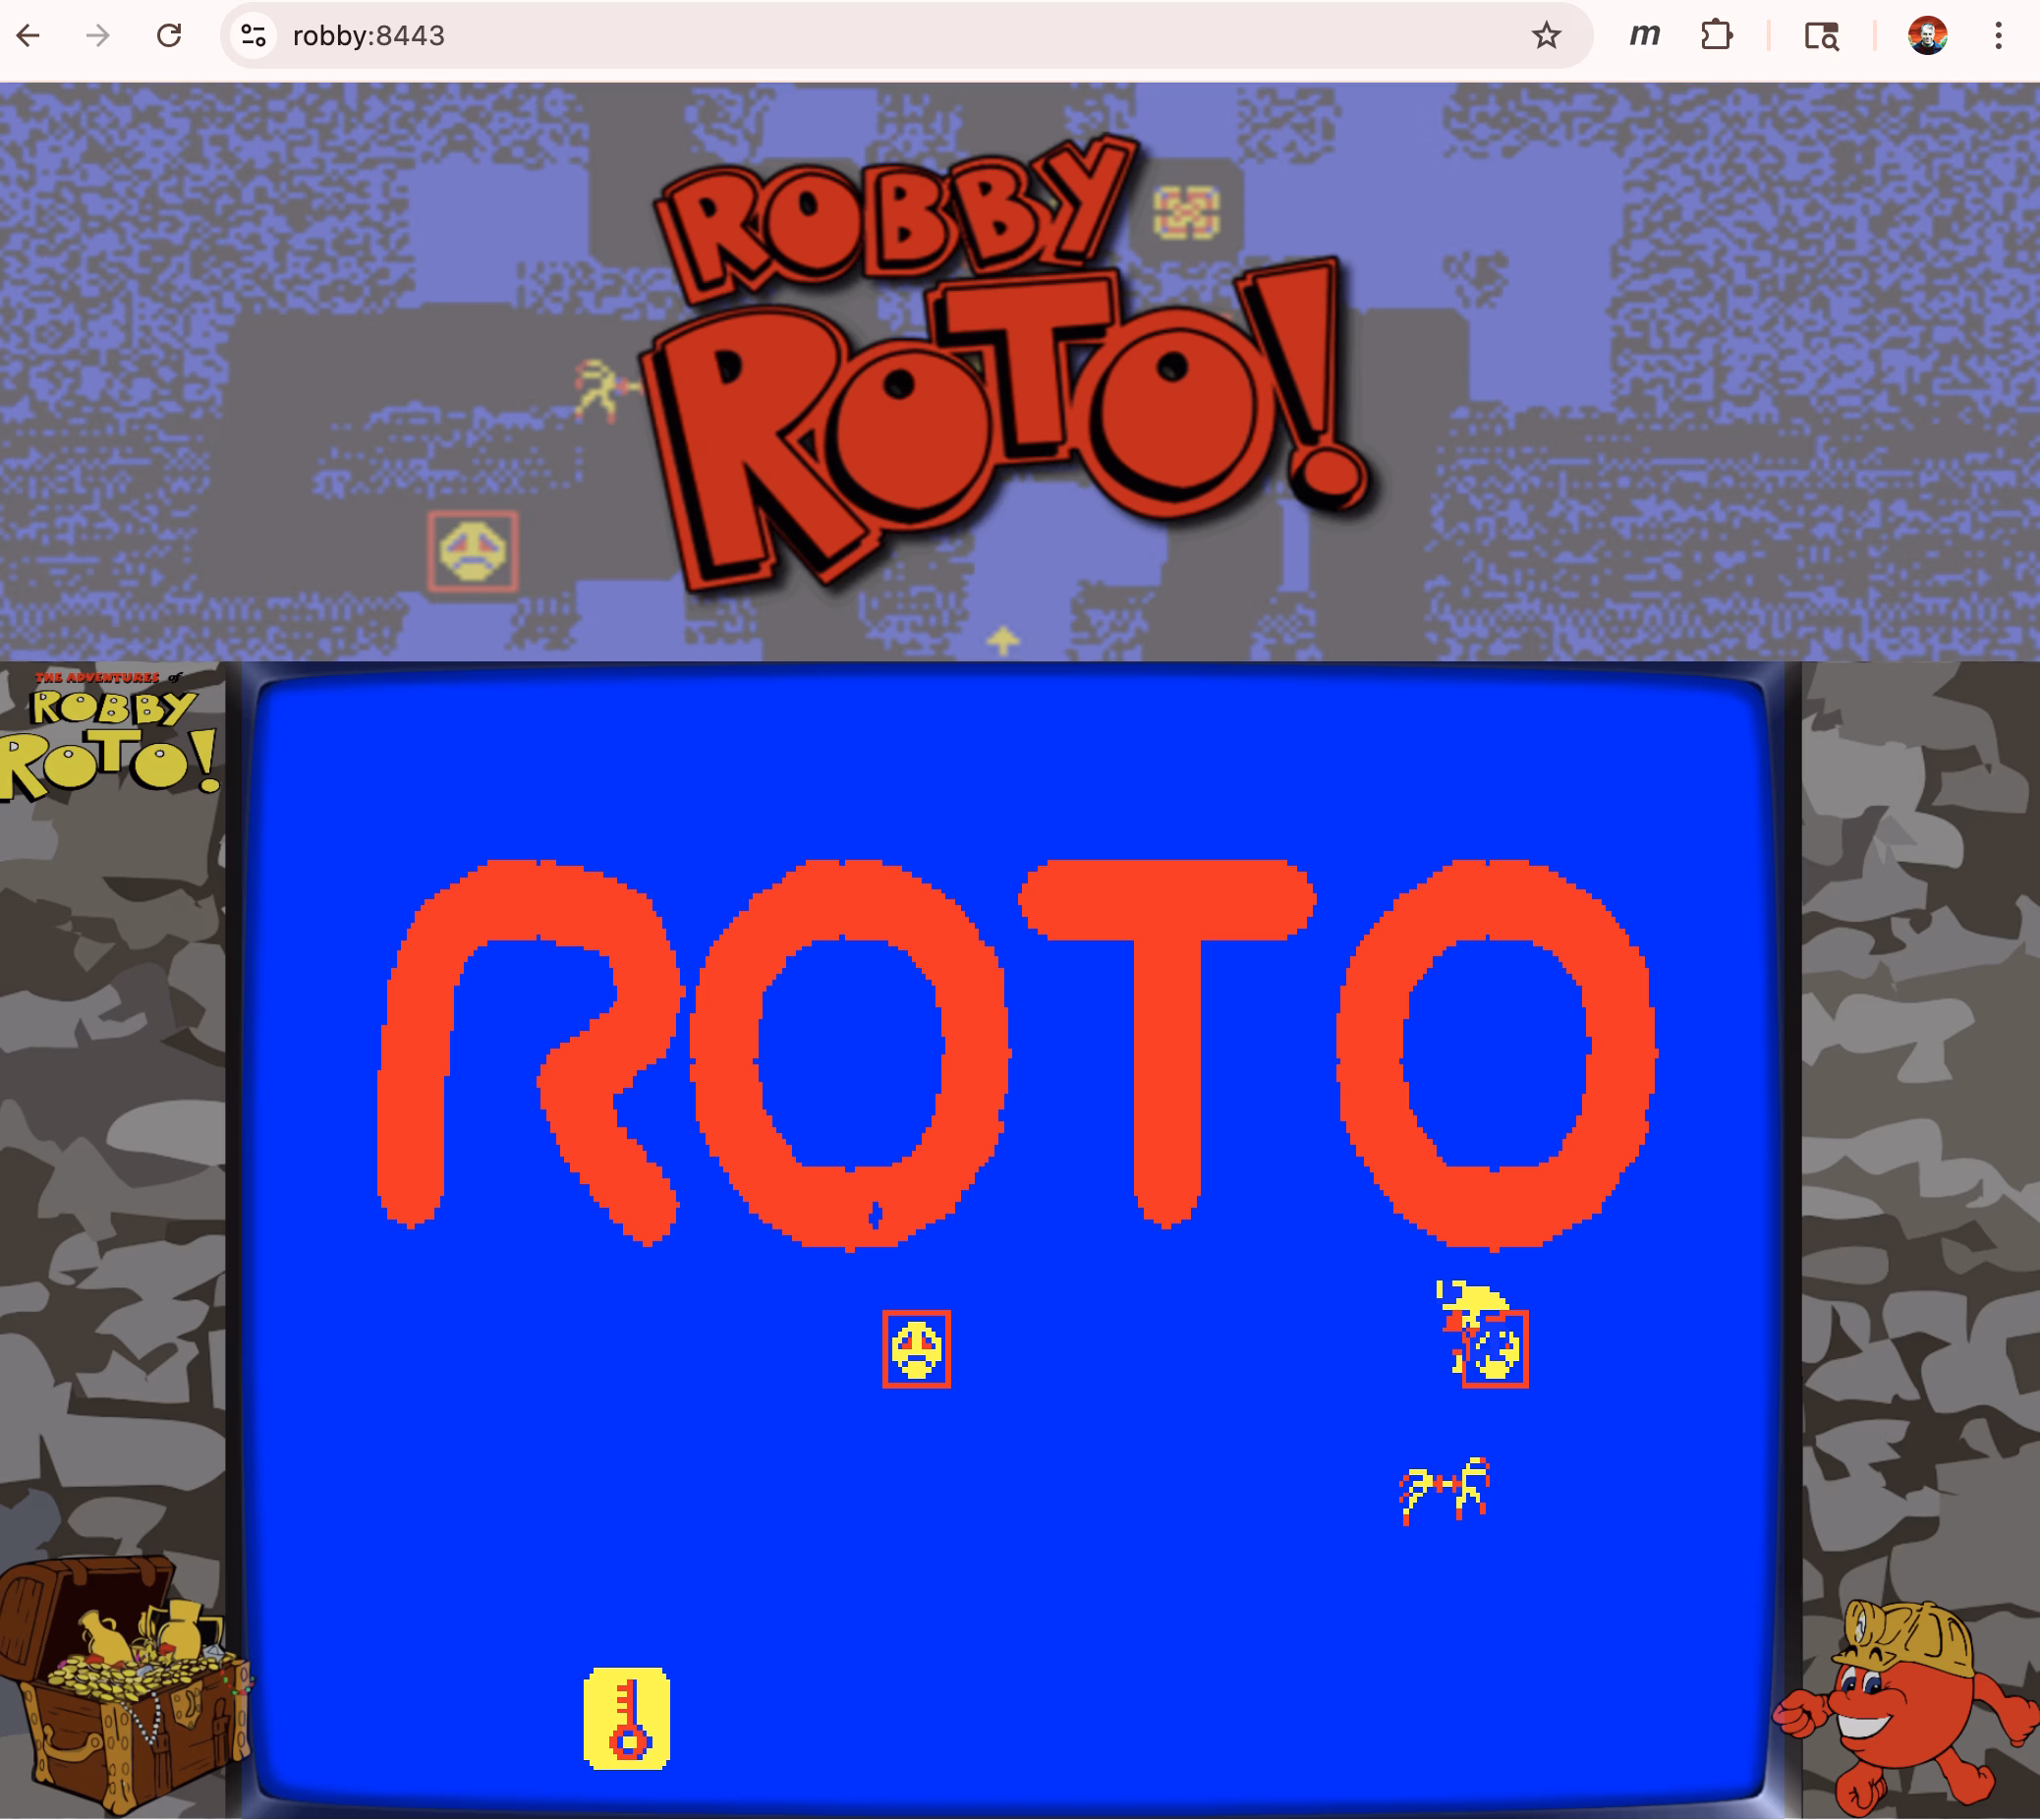
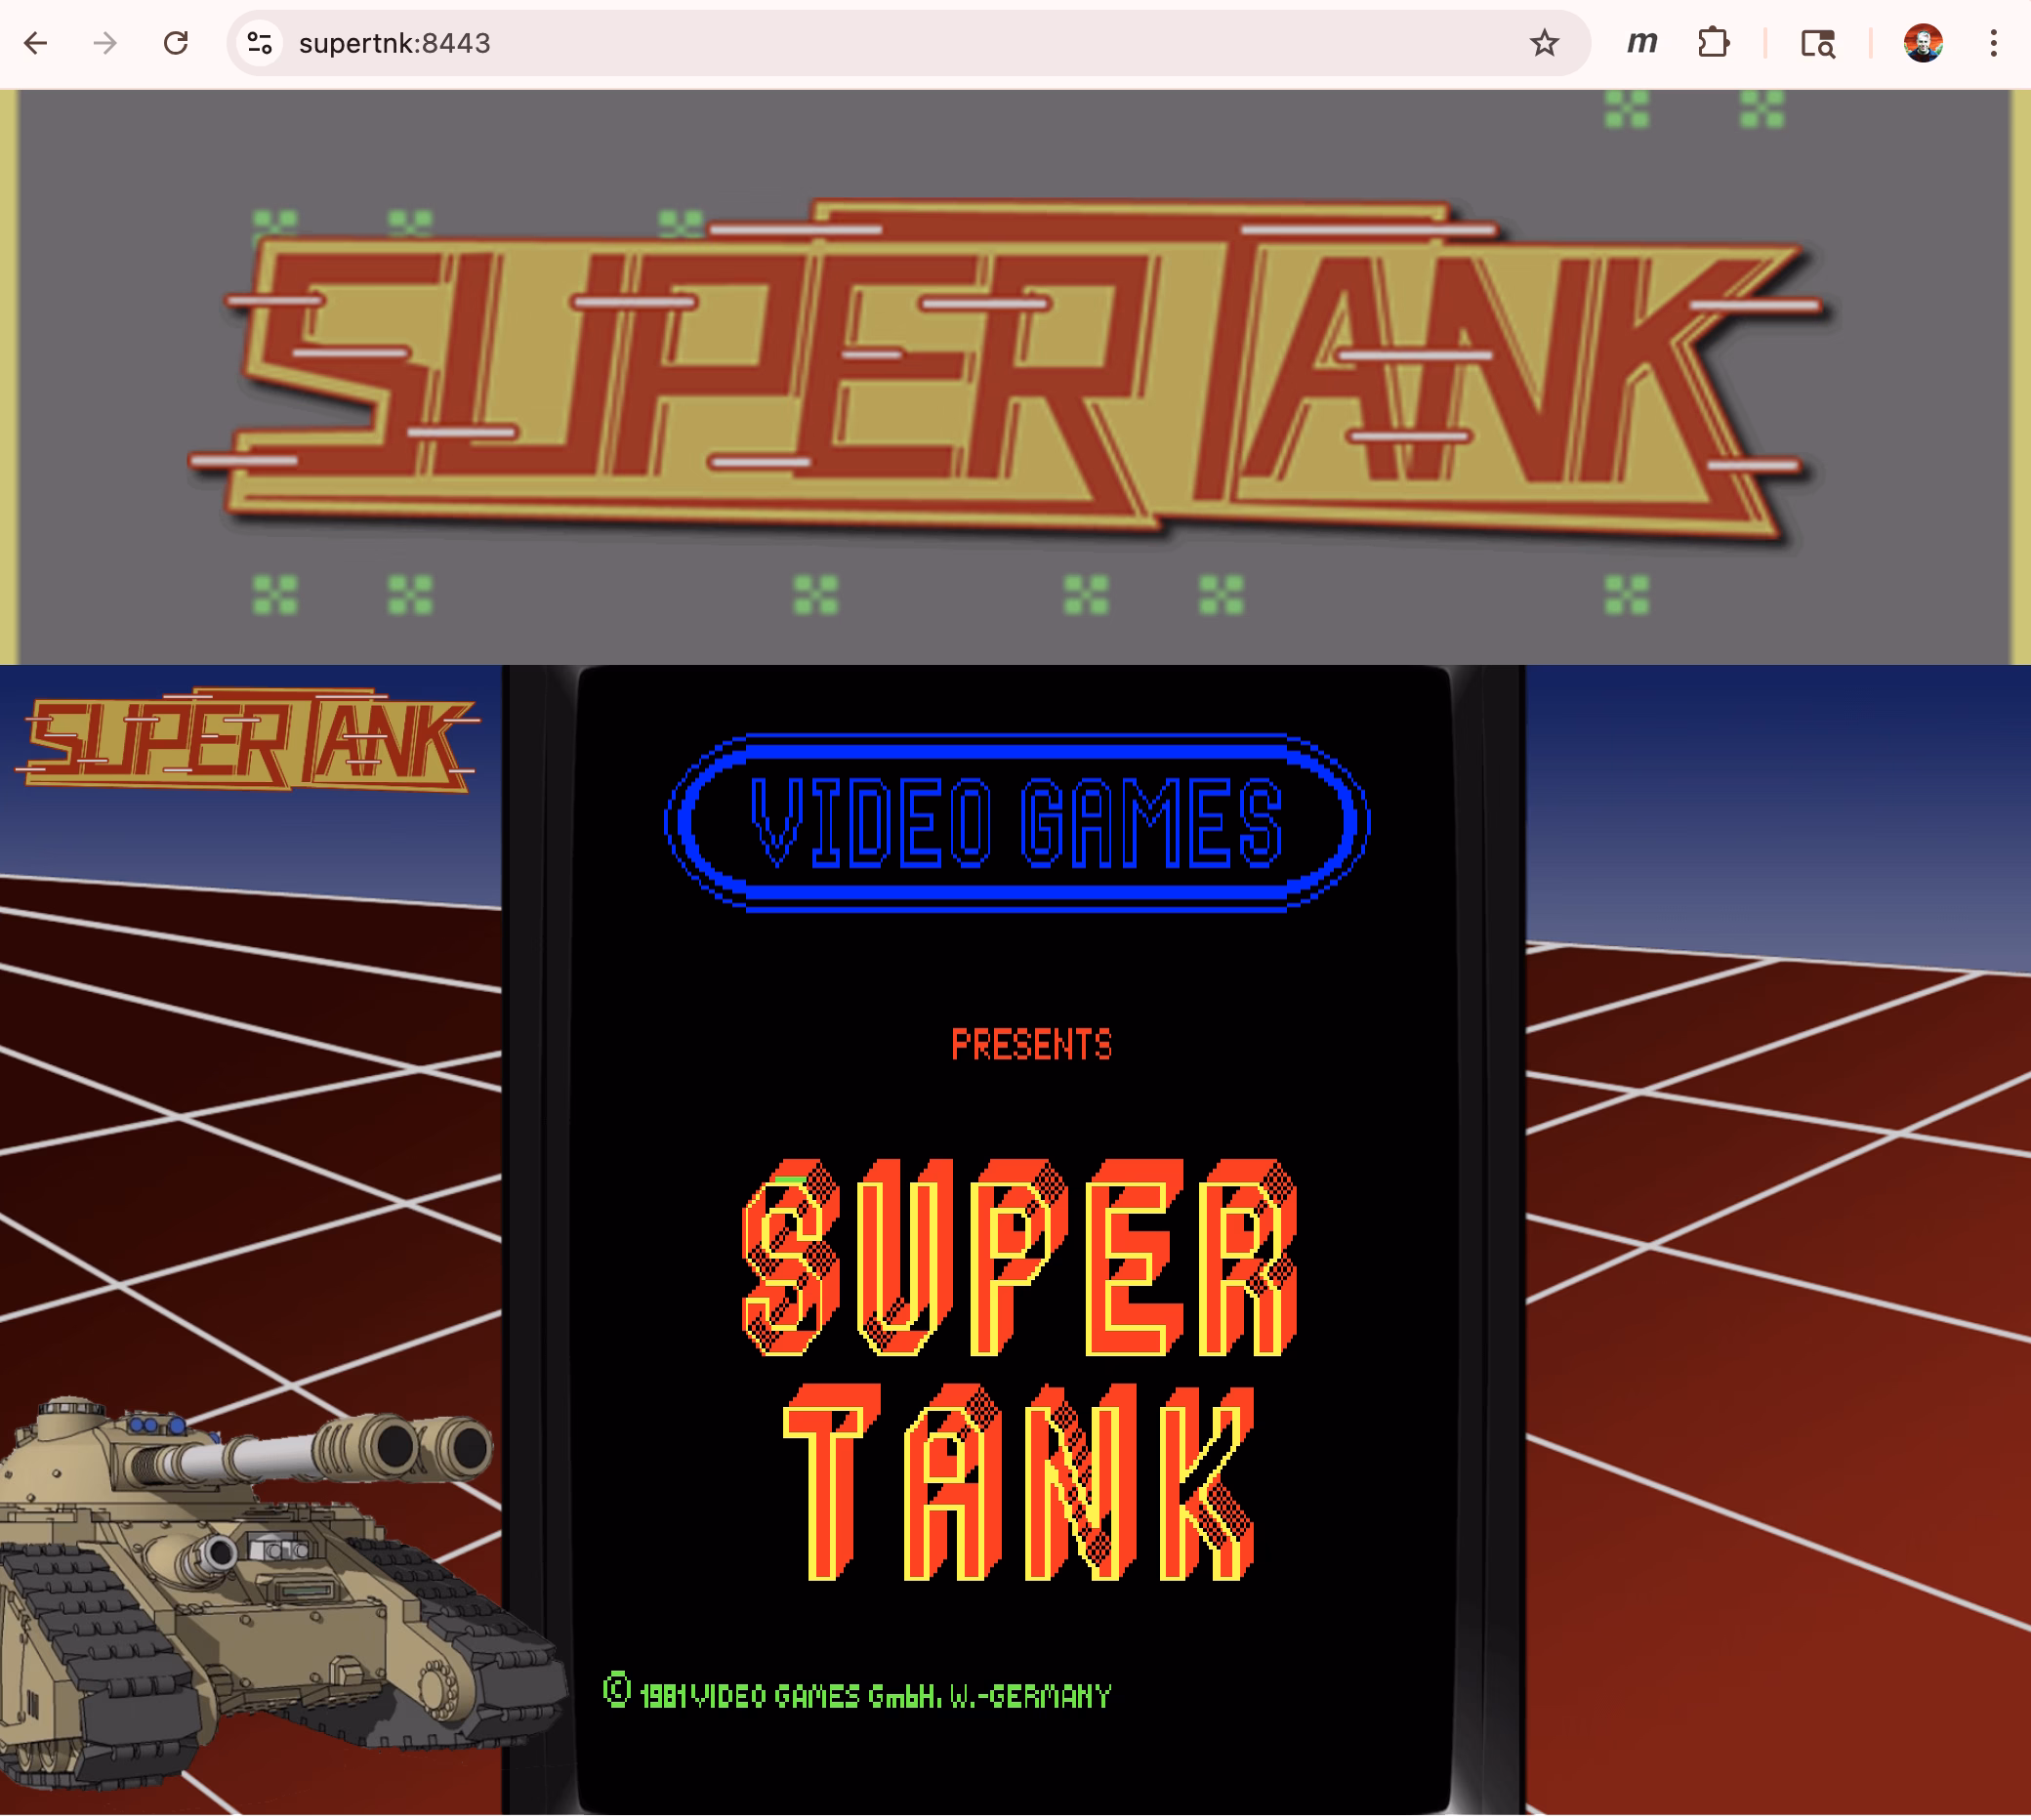
    -Sandy

    1. There was a Battlezone over by the grocery store, and a Missle Command somewhere in there too. Anyway enough “old man reminiscing to clouds”… ↩︎
  • Tired of Certificate Warnings

    My little kubernetes cluster has a few front-ends now, argocd, longhorn and the arkade servers. It’s getting a little tiresome having to OK certificate warnings like this:

    So I started reading up on cert-manager.

    I use letsencrypt and have some experience with setting that up. I’ve also got some experience setting up DNS challenges and auto-cert-renew, but I didn’t really want my little pi-cluster on (or near) the internet. I found this great article about setting up self-signed certs on cert-manager and basically followed it to add Certificates to all my IngressRoutes (thanks Remy).

    I’m building a little library of setup scripts for my kubernetes cluster (so far argocd and longhorn). When I roll the nodes, I run these scripts to set things up. The cert-manager.sh comes first (so that I can generate certs for the frontends of argocd and longhorn). That looks like this:

    sandy@bunsen:~/k3s$ cat cert-manager.sh 
    #!/bin/bash

    . ./functions.sh

    # Root CA is output as hobo-root-ca.crt - can be imported into chrome
    # or sudo cp hobo-root-ca.crt /usr/local/share/ca-certificates
    # sudo update-ca-certificates

    NAMESPACE=cert-manager

    helm install \
    cert-manager oci://quay.io/jetstack/charts/cert-manager \
    --version v1.18.2 \
    --namespace $NAMESPACE \
    --create-namespace \
    --set crds.enabled=true

    pod_wait $NAMESPACE

    kubectl apply -f hobo-root-ca.yaml
    sleep 5

    echo "Output root CA to hobo-root-ca.crt"
    kubectl get secret hobo-root-ca-secret -n $NAMESPACE -o jsonpath='{.data.tls\.crt}' | \
    base64 --decode | \
    openssl x509 -out hobo-root-ca.crt

    kubectl apply -f hobo-intermediate-ca1.yaml
    sleep 5
    # check the intermediate cert
    openssl verify -CAfile \
    <(kubectl -n $NAMESPACE get secret hobo-root-ca-secret -o jsonpath='{.data.tls\.crt}' | base64 --decode) \
    <(kubectl -n $NAMESPACE get secret hobo-intermediate-ca1-secret -o jsonpath='{.data.tls\.crt}' | base64 --decode)

    The script uses helm to install cert-manager in it’s own namespace and installs the root CA and intermediate CA ClusterIssuers objects:

    sandy@bunsen:~/k3s$ more hobo-root-ca.yaml 
    apiVersion: cert-manager.io/v1
    kind: ClusterIssuer
    metadata:
    name: hobo-root-ca-issuer-selfsigned
    spec:
    selfSigned: {}
    ---
    apiVersion: cert-manager.io/v1
    kind: Certificate
    metadata:
    name: hobo-root-ca
    namespace: cert-manager
    spec:
    isCA: true
    commonName: hobo-root-ca
    secretName: hobo-root-ca-secret
    duration: 87600h # 10y
    renewBefore: 78840h # 9y
    privateKey:
    algorithm: ECDSA
    size: 256
    issuerRef:
    name: hobo-root-ca-issuer-selfsigned
    kind: ClusterIssuer
    group: cert-manager.io
    ---
    apiVersion: cert-manager.io/v1
    kind: ClusterIssuer
    metadata:
    name: hobo-root-ca-issuer
    spec:
    ca:
    secretName: hobo-root-ca-secret

    sandy@bunsen:~/k3s$ more hobo-intermediate-ca1.yaml 
    apiVersion: cert-manager.io/v1
    kind: Certificate
    metadata:
    name: hobo-intermediate-ca1
    namespace: cert-manager
    spec:
    isCA: true
    commonName: hobo-intermediate-ca1
    secretName: hobo-intermediate-ca1-secret
    duration: 43800h # 5y
    renewBefore: 35040h # 4y
    privateKey:
    algorithm: ECDSA
    size: 256
    issuerRef:
    name: hobo-root-ca-issuer
    kind: ClusterIssuer
    group: cert-manager.io
    ---
    apiVersion: cert-manager.io/v1
    kind: ClusterIssuer
    metadata:
    name: hobo-intermediate-ca1-issuer
    spec:
    ca:
    secretName: hobo-intermediate-ca1-secret

    ClusterIssuers basically generate key-pairs and dump the key/crt pair into a kubernetes secret. The cert-manager.sh script dumps the .crt out of the root-ca secret into a file called hobo-root-ca.crt which can be installed in chrome (navigate to chrome://settings/ -> Privacy and Security -> Manage Certificates …). You can also import on linux in general with sudo cp hobo-root-ca.crt /usr/local/share/ca-certificates/; sudo update-ca-certificates

    Update The Game Helm Chart So My Services have Certificates

    With cert-manager installed and configured, I could upgrade the arcade helm chart. Briefly that looks like this:

    sandy@bunsen:~/arkade$ git diff 5cbd3f5e742a8a8f272cb4f1547faa51aa1a216d
    diff --git a/Makefile b/Makefile
    index fa0ea12..1db1dd6 100644
    --- a/Makefile
    +++ b/Makefile
    @@ -4,7 +4,7 @@ $(strip $(firstword $(foreach game,$(GAMES),$(findstring $(game),$(1)))))
    endef

    # Variables
    -CHART_VER := 0.1.5
    +CHART_VER := 0.1.6
    BUILD_IMAGE ?= mamebuilder
    TAG ?= latest
    SHELL := /bin/bash
    diff --git a/helm/game/templates/certificate.yaml b/helm/game/templates/certificate.yaml
    new file mode 100644
    index 0000000..e5cf300
    --- /dev/null
    +++ b/helm/game/templates/certificate.yaml
    @@ -0,0 +1,14 @@
    +{{- if .Values.certificate.enabled -}}
    +apiVersion: cert-manager.io/v1
    +kind: Certificate
    +metadata:
    + name: {{ include "game.fullname" . }}
    + namespace: games
    +spec:
    + secretName: {{ include "game.fullname" . }}-cert-secret # <=== Name of secret where the generated certificate will be stored.
    + dnsNames:
    + - "{{ include "game.fullname" . }}"
    + issuerRef:
    + name: hobo-intermediate-ca1-issuer
    + kind: ClusterIssuer
    +{{- end }}
    diff --git a/helm/game/templates/ingressroute.yaml b/helm/game/templates/ingressroute.yaml
    index 6838816..3b73b41 100644
    --- a/helm/game/templates/ingressroute.yaml
    +++ b/helm/game/templates/ingressroute.yaml
    @@ -3,6 +3,9 @@ apiVersion: traefik.io/v1alpha1
    kind: IngressRoute
    metadata:
    name: {{ include "game.fullname" . }}
    + annotations:
    + cert-manager.io/cluster-issuer: hobo-intermediate-ca1-issuer
    + cert-manager.io/common-name: {{ include "game.fullname" . }}
    spec:
    entryPoints:
    - websecure
    @@ -14,5 +17,5 @@ spec:
    - name: svc-{{ include "game.fullname" . }}
    port: 80
    tls:
    - certResolver: default
    + secretName: {{ include "game.fullname" . }}-cert-secret
    {{- end }}
    diff --git a/helm/game/values.yaml b/helm/game/values.yaml
    index 4ed05a1..278754c 100644
    --- a/helm/game/values.yaml
    +++ b/helm/game/values.yaml
    @@ -76,6 +76,9 @@ ingress:
    ingressroute:
    enabled: true

    +certificate:
    + enabled: true
    +
    resources: {}
    # We usually recommend not to specify default resources and to leave this as a conscious
    # choice for the user. This also increases chances charts run on environments with little

    I added the certificate template in my helm chart, and then added cert-manager annotations to the IngressRoute and changed the tls: definition.

    Push the helm chart change and sync the ArgoCD projects and voila!

    I also updated the argocd and longhorn setups to add Certificates to their IngressRoute definitions – so now all the frontends in my cluster can be accessed without the security warning.

    -Sandy

  • Longhorn for the Arkade

    So there’s a problem in the kubernetes pi-cluster…When I dump a list of pods vs nodes it looks like this:

    sandy@bunsen:~/arkade$ kubectl -n games get pods -ojsonpath='{range .items[*]}{.metadata.name},{.spec.nodeName}{"\n"}{end}' 
    1943mii-b59f897f-tkzzj,node-100000001b5d3ab7
    20pacgal-df4b8848c-dmgxj,node-100000001b5d3ab7
    centiped-9c676978c-pdhh7,node-100000001b5d3ab7
    circus-7c755f8859-m8t7l,node-100000001b5d3ab7
    defender-654d5cbfc5-pv7xk,node-100000001b5d3ab7
    dkong-5cfb8465c-zbsd6,node-100000001b5d3ab7
    gng-6d5c97d9b7-9vvhn,node-100000001b5d3ab7
    invaders-76c46cb6f5-mr9pn,node-100000001b5d3ab7
    joust-ff654f5b9-c5bnv,node-100000001b5d3ab7
    milliped-86bf6ddd95-xphhg,node-100000001b5d3ab7
    pacman-559b59df59-9mkvq,node-100000001b5d3ab7
    qix-7d5995ff79-cdt4d,node-100000001b5d3ab7
    robby-5947cf94b7-w4cfq,node-100000001b5d3ab7
    supertnk-5dbbffdf7f-9v4vd,node-100000001b5d3ab7
    topgunnr-c8fb7467f-nlvzn,node-100000001b5d3ab7
    truxton-76bf94c65f-72hbt,node-100000001b5d3ab7
    victory-5d695d668c-d9wth,node-100000001b5d3ab7

    All the pods are on the same node! But I’ve got three nodes and a control plane running

    sandy@bunsen:~/arkade$ kubectl get nodes
    NAME STATUS ROLES AGE VERSION
    node-100000001b5d3ab7 Ready <none> 39m v1.33.3+k3s1
    node-100000008d83d984 Ready <none> 33m v1.33.3+k3s1
    node-10000000e5fe589d Ready <none> 39m v1.33.3+k3s1
    node-6c1a0ae425e8665f Ready control-plane,master 45m v1.33.3+k3s1

    Access Mode Trouble

    The is a problem with the rom data PersistentVolumeClaim:

    sandy@bunsen:~/arkade$ cat roms-pvc.yaml 
    apiVersion: v1
    kind: PersistentVolumeClaim
    metadata:
    name: roms
    namespace: games
    spec:
    accessModes:
    - ReadWriteOnce
    storageClassName: local-path
    resources:
    requests:
    storage: 128Mi

    When I setup the PVC I just used the built-in local-path storage class that comes default with k3s. local-path only supports ReadWriteOnce accessMode which means any pods that want to mount the roms volume have to be placed on the same node.

    Trying out Longhorn

    So I thought I’d give Longhorn a try. The basic install goes like this:

    kubectl apply -f https://raw.githubusercontent.com/longhorn/longhorn/v1.9.1/deploy/longhorn.yaml

    There’s a nice frontend user interface for the system so I added a Traefik IngressRoute to get at that (and a host-record for dnsmasq on the cluster’s router).

    sandy@bunsen:~/k3s$ more longhorn_IngressRoute.yaml 
    apiVersion: traefik.io/v1alpha1
    kind: IngressRoute
    metadata:
    name: longhorn
    namespace: longhorn-system
    spec:
    entryPoints:
    - websecure
    routes:
    - kind: Rule
    match: Host(`longhorn`)
    priority: 10
    services:
    - name: longhorn-frontend
    port: 80
    tls:
    certResolver: default
    kubectl apply -f longhorn_IngressRoute.yaml

    After a little wait the UI was available:

    Size Matters


    Pretty quickly after that the whole cluster crashed (the picture above was taken just now after I fixed a bunch of stuff).

    When I first setup the cluster I’d used micro SD cards like these ones:

    After running the cluster for about a week and then adding Longhorn, the file systems on the nodes were pretty full (especially on the control-plane node). Adding the longhorn images put storage pressure on the nodes so that nothing could schedule. So I switched out the micro SD cards (128GB on the control-plane and 64GB on the other nodes). Then I rolled all the nodes to reinstall the OS and expand the storage volumes.

    With a more capable storage driver in place, it was time to try updating the PVC definition:

    andy@bunsen:~/arkade$ cat roms-pvc.yaml 
    apiVersion: v1
    kind: PersistentVolumeClaim
    metadata:
    name: roms
    namespace: games
    spec:
    accessModes:
    - ReadWriteMany
    storageClassName: longhorn
    resources:
    requests:
    storage: 128Mi

    Here I changed to ReadWriteMany access mode and longhorn storageClassName. Then re-deploy my arkade projects:

    make argocd_create argocd_sync
    ...
    sandy@bunsen:~/arkade$ kubectl -n games get pods
    NAME READY STATUS RESTARTS AGE
    1943mii-b59f897f-rsklf 0/1 ContainerCreating 0 3m30s
    ...
    topgunnr-c8fb7467f-c7hbb 0/1 ContainerCreating 0 3m2s
    truxton-76bf94c65f-8vzn4 0/1 ContainerCreating 0 3m
    victory-5d695d668c-9wdcv 0/1 ContainerCreating 0 2m59s

    Something’s not right the pods aren’t starting…

    sandy@bunsen:~/arkade$ kubectl -n games describe pod victory-5d695d668c-9wdcv
    Name: victory-5d695d668c-9wdcv
    ...
    Containers:
    game:
    Container ID:
    Image: docker-registry:5000/victory:latest
    Image ID:
    Port: 80/TCP
    Host Port: 0/TCP
    State: Waiting
    ...
    Conditions:
    Type Status
    PodReadyToStartContainers False
    Initialized True
    Ready False
    ContainersReady False
    PodScheduled True
    Volumes:
    roms:
    Type: PersistentVolumeClaim (a reference to a PersistentVolumeClaim in the same namespace)
    ClaimName: roms
    ReadOnly: false
    ...
    Node-Selectors: <none>
    Tolerations: node.kubernetes.io/not-ready:NoExecute op=Exists for 300s
    node.kubernetes.io/unreachable:NoExecute op=Exists for 300s
    Events:
    Type Reason Age From Message
    ---- ------ ---- ---- -------
    Normal Scheduled 3m39s default-scheduler Successfully assigned games/victory-5d695d668c-9wdcv to node-100000001b5d3ab7
    Warning FailedAttachVolume 3m11s (x3 over 3m36s) attachdetach-controller AttachVolume.Attach failed for volume "pvc-003e701a-aec0-4ec5-b93e-4c9cc9b25b1c" : CSINode node-100000001b5d3ab7 does not contain driver driver.longhorn.io
    Normal SuccessfulAttachVolume 2m38s attachdetach-controller AttachVolume.Attach succeeded for volume "pvc-003e701a-aec0-4ec5-b93e-4c9cc9b25b1c"
    Warning FailedMount 2m36s kubelet MountVolume.MountDevice failed for volume "pvc-003e701a-aec0-4ec5-b93e-4c9cc9b25b1c" : rpc error: code = Internal desc = mount failed: exit status 32
    Mounting command: /usr/local/sbin/nsmounter
    Mounting arguments: mount -t nfs -o vers=4.1,noresvport,timeo=600,retrans=5,softerr 10.43.221.242:/pvc-003e701a-aec0-4ec5-b93e-4c9cc9b25b1c /var/lib/kubelet/plugins/kubernetes.io/csi/driver.longhorn.io/a8647ba9f96bea039a22f898cf70b4284f7c1b8ba30808feb56734de896ec0b8/globalmount

    Oh – the NFS mounts are failing. Guess I need to install NFS in the nodes. To do that, I just updated my cloud-init/userdata definition to add the network tool packages:

    roll – reinstall – redeploy – repeat…

    Finally Distributed Storage

    sandy@bunsen:~/arkade$ kubectl -n games get pods -ojsonpath='{range .items[*]}{.metadata.name},{.spec.nodeName}{"\n"}{end}' 
    1943mii-b59f897f-qfb97,node-100000008d83d984
    20pacgal-df4b8848c-x2qdm,node-100000001b5d3ab7
    centiped-9c676978c-qcgxg,node-100000008d83d984
    circus-7c755f8859-s2t87,node-100000001b5d3ab7
    defender-654d5cbfc5-7922b,node-10000000e5fe589d
    dkong-5cfb8465c-6hnrn,node-100000008d83d984
    gng-6d5c97d9b7-7qc9n,node-10000000e5fe589d
    invaders-76c46cb6f5-m2x7n,node-100000001b5d3ab7
    joust-ff654f5b9-htbrn,node-100000001b5d3ab7
    milliped-86bf6ddd95-sq4jt,node-100000008d83d984
    pacman-559b59df59-tkwx4,node-10000000e5fe589d
    qix-7d5995ff79-s8vxv,node-100000001b5d3ab7
    robby-5947cf94b7-k876b,node-100000008d83d984
    supertnk-5dbbffdf7f-pn4fw,node-10000000e5fe589d
    topgunnr-c8fb7467f-5v5h6,node-100000001b5d3ab7
    truxton-76bf94c65f-nqcdt,node-10000000e5fe589d
    victory-5d695d668c-dxdd8,node-100000008d83d984

    !!

    Longhorn Setup

    Here’s my longhorn setup script:

    sandy@bunsen:~/k3s$ cat longhorn.sh 
    #!/bin/bash
    . ./functions.sh

    kubectl apply -f https://raw.githubusercontent.com/longhorn/longhorn/v1.9.1/deploy/longhorn.yaml
    kubectl apply -f longhorn_IngressRoute.yaml

    https_wait https://longhorn

    USERNAME=myo
    PASSWORD=business

    CIFS_USERNAME=`echo -n ${USERNAME} | base64`
    CIFS_PASSWORD=`echo -n ${PASSWORD} | base64`

    cat <<EOF | kubectl apply -f -
    apiVersion: v1
    kind: Secret
    metadata:
    name: longhorn-smb-secret
    namespace: longhorn-system
    type: Opaque
    data:
    CIFS_USERNAME: ${CIFS_USERNAME}
    CIFS_PASSWORD: ${CIFS_PASSWORD}
    EOF

    kubectl create -f longhorn_BackupTarget.yaml


    sandy@bunsen:~/k3s$ cat longhorn_IngressRoute.yaml
    apiVersion: traefik.io/v1alpha1
    kind: IngressRoute
    metadata:
    name: longhorn
    namespace: longhorn-system
    spec:
    entryPoints:
    - websecure
    routes:
    - kind: Rule
    match: Host(`longhorn`)
    priority: 10
    services:
    - name: longhorn-frontend
    port: 80
    tls:
    certResolver: default

    sandy@bunsen:~/k3s$ cat longhorn_BackupTarget.yaml
    apiVersion: longhorn.io/v1beta2
    kind: BackupTarget
    metadata:
    name: default
    namespace: longhorn-system
    spec:
    backupTargetURL: "cifs://192.168.1.1/sim/longhorn_backup"
    credentialSecret: "longhorn-smb-secret"
    pollInterval: 5m0s

    I also added a BackupTarget pointed at my main samba server – and that needed a login secret (and took another node roll sequence to add because I forgot to add the cifs tools when I first added the nfs-common packages).

    -Sandy

  • Gitops for the Arkade

    In the last post I had built up some Makefiles and docker tooling to create nginx based images to serve the mame emulators. So, now it’s time to deploy the images to the kubernetes cluster using ArgoCD.

    Github Actions

    I setup a two self-hosted action runners to use with Github Actions. The action runner on my main server builds the emulators. Then the action runner on the in-cluster thinkpad can run deployments using argocd sync.

    Then I setup a maker workflow and tested out it out.

    name: Make
    on:
    workflow_dispatch:

    jobs:
    builder:
    environment: Games
    runs-on: www
    steps:
    - uses: actions/checkout@v4
    - name: Make the mamebuilder
    run: |
    make mamebuilder
    docker tag mamebuilder docker-registry:5000/mamebuilder
    docker push docker-registry:5000/mamebuilder
    games:
    environment: Games
    needs: [builder]
    runs-on: www
    steps:
    - uses: actions/checkout@v4
    - name: Make the game images
    run: |
    make
    echo done

    After triggering the make workflow on github, the build runs and emulator images are pushed to my private docker registry – checking that from inside the cluster’s network shows:

    sandy@bunsen:~/arkade/.github/workflows$ curl -X GET http://docker-registry:5000/v2/_catalog 
    {"repositories":["1943mii","20pacgal","centiped","circus","defender","dkong","gng","invaders","joust","mamebuilder","milliped","pacman","qix","robby","supertnk","tempest","topgunnr","truxton","victory"]}

    Helm Chart

    Next I worked on a helm chart for the emulators. I created the standard helm chart:

    mkdir helm
    cd helm
    helm create game

    On top of the default chart, I added a Traefik IngressRoute next to each deployment and a volume mount for the /var/www/html/roms directory. The final layout is like this:

    sandy@bunsen:~/arkade$ tree helm roms-pvc.yaml 
    helm
    └── game
    ├── charts
    ├── Chart.yaml
    ├── templates
    │   ├── deployment.yaml
    │   ├── _helpers.tpl
    │   ├── hpa.yaml
    │   ├── ingressroute.yaml
    │   ├── ingress.yaml
    │   ├── NOTES.txt
    │   ├── serviceaccount.yaml
    │   ├── service.yaml
    │   └── tests
    │   └── test-connection.yaml
    └── values.yaml
    roms-pvc.yaml [error opening dir]

    Most customization is in the values.yaml a diff of that against the default looks like this:

    sandy@bunsen:~/arkade/helm/game$ diff values.yaml  ~/test/game/
    25c25
    < create: false
    ---
    > create: true
    76,78d75
    < ingressroute:
    < enabled: true
    <
    110,113c107,111
    < volumes:
    < - name: roms
    < persistentVolumeClaim:
    < claimName: roms
    ---
    > volumes: []
    > # - name: foo
    > # secret:
    > # secretName: mysecret
    > # optional: false
    116,118c114,117
    < volumeMounts:
    < - name: roms
    < mountPath: /var/www/html/roms
    ---
    > volumeMounts: []
    > # - name: foo
    > # mountPath: "/etc/foo"
    > # readOnly: true

    The Traefik IngressRoute object replaces the usual kubernetes ingress. I added a couple targets in the Makefile that can package the chart and deploy all the emulators:

    package:
    $(HELM) package --version $(CHART_VER) helm/game

    install:
    @for game in $(GAMES) ; do \
    $(HELM) install $$game game-$(CHART_VER).tgz \
    --set image.repository="docker-registry:5000/$$game" \
    --set image.tag='latest' \
    --set fullnameOverride="$$game" \
    --create-namespace \
    --namespace games ;\
    done

    upgrade:
    @for game in $(GAMES) ; do \
    $(HELM) upgrade $$game game-$(CHART_VER).tgz \
    --set image.repository="docker-registry:5000/$$game" \
    --set image.tag='latest' \
    --set fullnameOverride="$$game" \
    --namespace games ;\
    done

    The initial install for all the emulators is make package install. Everything is installed into a namespace called games so it’s relatively to clean up the whole mess with kubect delete ns games. There was one adjustment I had to make in the helm chart…kubernetes enforces RFC 1035 for service names. I was using the game name as the service name, but games like 1943mii don’t conform. So I updated the service definitions in the chart like this: name: svc-{{ include "game.fullname" . }} to get around it.

    ArgoCD Setup


    ArgoCD is setup in the cluster based on the getting started guide. Ultimately, I made a little script argocd.sh to do the setup on repeat:

    #!/bin/bash

    ARGOCD_PASSWORD='REDACTED'

    kubectl create namespace argocd
    kubectl apply -n argocd -f https://raw.githubusercontent.com/argoproj/argo-cd/stable/manifests/install.yaml

    sleep 30
    kubectl -n argocd patch configmap/argocd-cmd-params-cm \
    --type merge \
    -p '{"data":{"server.insecure":"true"}}'

    kubectl -n argocd apply -f argocd_IngressRoute.yaml

    sleep 30
    INITIAL_PASSWORD=$(argocd admin initial-password -n argocd 2>/dev/null | awk '{print $1; exit}')
    argocd login argocd --username admin --insecure --skip-test-tls --password "${INITIAL_PASSWORD}"
    argocd account update-password --account admin --current-password "${INITIAL_PASSWORD}" --new-password "${ARGOCD_PASSWORD}"

    That installs ArgoCD into it’s own namespace and sets up an IngressRoute using Traefik. The ConfigMap patch is necessary to avoid redirect loops (Traefik proxies https at the LoadBalancer anyway). Then it goes on and logs in the admin user and updates the password.


    Then added a couple more targets to the Makefile

    argocd_create:
    $(KUBECTL) create ns games || true
    $(KUBECTL) apply -f roms-pvc.yaml
    @for game in $(GAMES) ; do \
    $(ARGOCD) app create $$game \
    --repo https://github.com/simsandyca/arkade.git \
    --path helm/game \
    --dest-server https://kubernetes.default.svc \
    --dest-namespace games \
    --helm-set image.repository="docker-registry:5000/$$game" \
    --helm-set image.tag='latest' \
    --helm-set fullnameOverride="$$game" ;\
    done

    argocd_sync:
    @for game in $(GAMES) ; do \
    $(ARGOCD) app sync $$game ; \
    done

    And added a workflow in GitHub actions:


    Ultimately I get this dashboard in ArgoCD with all the emulators running.

    Sync is manual here, but the beauty of ArgoCD is that it tracks your git repo and can deploy the changes automatically.

    Try It Out

    To use the IngressRoute, I need to add DNS entries for each game. The pi-cluster is behind an old ASUS router running FreshTomato so I can add those using dnsmasq host-records:


    Let’s try loading https://victory

    Oh that’s right no game roms yet. To test it out I’d need a royalty free ROM – there’s a few available for personal use on the MAME Project page. To load victory.zip I can do something like this:

    sandy@bunsen:~/arkade$ kubectl -n games get pod -l app.kubernetes.io/instance=victory 
    NAME READY STATUS RESTARTS AGE
    victory-5d695d668c-tj7ch 1/1 Running 0 12m
    sandy@bunsen:~/arkade$ kubectl -n games cp ~/roms/victory.zip victory-5d695d668c-tj7ch:/var/www/html/roms/@sandy

    Then from the bunsen laptop that lives behind the router (+- the self-signed certificate) I can load the https://victory and click the launch button…

    On to CI/CD?

    So far, this feels like it’s about as far as I can take the Arkade project. Is it full on continuous delivery? No – but this is about all I’d attempt with a personal github account running self-hosted runners. It’s close though – the builds are automated, ArgoCD is configured and watching for changes in the repo. There are github actions in place to run the builds. I’d still need some versioning on the image tags to have rollback targets and release tracking…maybe that’s next

    -Sandy

  • Automating the Arkade Build

    Last entry I got my proof of concept arcade emulator going. I’m calling the project “arkade”. First thing was I setup a new github repo for the project. Last time I’d found that archive.org seems to use MAME version 0.239 and emsdk 3.0.0 – after some more trial and error I found that they actually use emsdk v3.1.0 (based on matching the llvm hash in the version string that gets dumped.

    The MAME Builder Image

    So I locked that into a Dockerfile:

    FROM ubuntu:24.04

    ENV EMSDK_VER=3.1.0
    ENV MAME_VER=mame0239

    RUN apt update \
    && DEBIAN_FRONTEND=noninteractive \
    apt -y install git build-essential python3 libsdl2-dev libsdl2-ttf-dev \
    libfontconfig-dev libpulse-dev qtbase5-dev qtbase5-dev-tools qtchooser qt5-qmake \
    && apt clean \
    && rm -rf /var/lib/apt/lists/*

    # Build up latest copy of mame for -xmllist function
    RUN git clone https://github.com/mamedev/mame --depth 1 \
    && make -C /mame -j $(nproc) OPTIMIZE=3 NOWERROR=1 TOOLS=0 REGENIE=1 \
    && install /mame/mame /usr/local/bin \
    && rm -rf /mame

    #Setup to build WEBASSEMBLY versions
    RUN git clone https://github.com/mamedev/mame --depth 1 --branch $MAME_VER \
    && git clone https://github.com/emscripten-core/emsdk.git \
    && cd emsdk \
    && ./emsdk install $EMSDK_VER \
    && ./emsdk activate $EMSDK_VER

    ADD Makefile.docker /Makefile

    WORKDIR /

    RUN mkdir -p /output

    The docker image also has a full build of the latest version of MAME (I’ll use that later). The last command sets up the MAME and Enscripten versions that seemed to work.

    The Game Images

    That put the tools in place I wanted to move onto building up little nginx docker images one for each arcade machine. To get that all going the image needs a few bits and pieces:

    • nginx webserver and basic configuration
    • the emularity launcher and support javascript
    • the emulator javascript (emulator.js and emulator.wasm)
    • the arcade rom to playback in the emulator

    That collection of stuff looks like this as a Dockerfile:

    FROM arm64v8/nginx

    ADD nginx/default /etc/nginx/conf.d/default.conf

    RUN mkdir -p /var/www/html /var/www/html/roms

    ADD build/{name}/* /var/www/html

    Couple things to see here. I’m using the arm64v8 version of nginx because I’m gonna want to run the images in my pi cluster. The system will buildup a set of files in build/{name} where name is the name of the game.

    So I setup a Makefile that creates the build/<game> directory populated with all the bits and pieces. There’s a collection of meta data needed to render a game:

    • The name of the game
    • The emulator for the game
    • the width x height of the game

    MAME can actually output all kinds of metadata about the games it emulates. To get access to that, I build the full version of the emulator binary so that I can run that mame -listxml <gamelist>. There’s a target in the Makefile that runs mame on the small list of games and outputs a file called list.xml. From that, there’s a couple python scripts that parse down the xml to use the metadata.

    Ultimately the build directory for a game looks something like this:

    sandy@www:~/arkade/build$ tree joust
    joust
    ├── browserfs.min.js
    ├── browserfs.min.js.map
    ├── es6-promise.js
    ├── images
    │   ├── 11971247621441025513Sabathius_3.5_Floppy_Disk_Blue_Labelled.svg
    │   └── spinner.png
    ├── index.html
    ├── joust.json
    ├── loader.js
    ├── logo
    │   ├── emularity_color.png
    │   ├── emularity_color_small.png
    │   ├── emularity_dark.png
    │   └── emularity_light.png
    ├── mamewilliams.js
    └── mamewilliams.wasm
    
    3 directories, 14 files

    And the index.html file looks like this:

    sandy@www:~/arkade/build/joust$ cat index.html 

    <html>
    <head>
    <meta http-equiv="Content-Type" content="text/html; charset=utf-8">
    <title>Joust (Green label)</title>
    </head>
    <body>
    <canvas id="canvas" style="width: 50%; height: 50%; display: block; margin: 0 auto;"></canvas>
    <script type="text/javascript" src="es6-promise.js"></script>
    <script type="text/javascript" src="browserfs.min.js"></script>
    <script type="text/javascript" src="loader.js"></script>
    <script type="text/javascript">
    var emulator =
    new Emulator(document.querySelector("#canvas"),
    null,
    new MAMELoader(MAMELoader.driver("joust"),
    MAMELoader.nativeResolution(292, 240),
    MAMELoader.scale(3),
    MAMELoader.emulatorWASM("mamewilliams.wasm"),
    MAMELoader.emulatorJS("mamewilliams.js"),
    MAMELoader.extraArgs(['-verbose']),
    MAMELoader.mountFile("joust.zip",
    MAMELoader.fetchFile("Game File",
    "/roms/joust.zip"))))
    emulator.start({ waitAfterDownloading: true });
    </script>
    </body>
    </html>

    The metadata shows up here in a few ways. The <title> field in the index.html is based on the game description. The nativeResolution is a function of the game display “rotation” and width/height. Pulling that information from the metadata helps get the game viewport size and aspect ratio correct. The name of the game is used to set the driver and rom name. There’s a separate driver field in the metadata which is actually the emulator name. For instance in this example, joust is a game you emulate with the williams emulator. Critically the emulator name is used to set the SOURCE= line in the mame build for the emulator.

    There’s a m->n relationship between emulator and game (e.g. defender is also a williams game). That mapping is handled using jq and the build/<game>/<game>.json files.

    Once the build directory is populated, it’s time to build the docker images. There’s a gamedocker.py script that writes a Dockerfile.<game> for each game. After that, it runs docker buildx build --platform linux/arm64... to build up the images.

    Docker Multiplatform and Add a Registry

    I do the building on my 8-core amd/64 server so I needed to do a couple things to get the images over to my pi cluster. First I had to setup docker multiplatform builds:

     docker run --privileged --rm tonistiigi/binfmt --install all

    I also setup a small private docker registry using this docker-compose file

    sandy@www:/sim/registry$ ls
    config data docker-compose.yaml
    sandy@www:/sim/registry$ cat docker-compose.yaml
    version: '3.3'

    services:
    registry:
    container_name: registry
    restart: always
    image: registry:latest
    ports:
    - 5000:5000
    volumes:
    - ./config/config.yml:/etc/docker/registry/config.yml:ro
    - ./data:/var/lib/registry:rw
    #environment:
    #- "STANDALONE=true"
    #- "MIRROR_SOURCE=https://registry-1.docker.io"
    #- "MIRROR_SOURCE_INDEX=https://index.docker.io"

    I also had to reconfigure the nodes in the pi cluster to use an insecure registry. To do that I added this bit to my cloud-init configuration:

    write_files:
    - path: /etc/cloud/templates/hosts.debian.tmpl
    append: true
    content: |
    192.168.1.1 docker-registry www
    - path: /etc/rancher/k3s/registries.yaml
    content: |
    mirrors:
    "docker-registry:5000":
    endpoint:
    - "http://docker-registry:5000"
    configs:
    "docker-registry:5000":
    tls:
    insecure_skip_verify: true

    Then I reinstalled all the nodes to pull that change.

    Ultimately, I was able to test it out by creating a little deployment:

    kubectl create deployment 20pacgal --image=docker-registry:5000/20pacgal --replicas=1 --port=80

    sandy@bunsen:~$ kubectl get pods 
    NAME READY STATUS RESTARTS AGE
    20pacgal-77b777866c-d4dhf 1/1 Running 0 86m
    sandy@bunsen:~$ kubectl port-forward --address 0.0.0.0 20pacgal-77b777866c-d4dhf 8888:80
    Forwarding from 0.0.0.0:8888 -> 80
    Handling connection for 8888
    Handling connection for 8888


    Almost there. The rom file is still missing – I’ll need to setup a physical volume to hold the roms…next time.

    -Sandy